前置工作
安裝OEM Server 10.2.0.3
OEM升級10.2.0.5
OEM升級Agent
Client Agnet安裝/移除
OEM/OMS/Agent日常維護指令
安裝過程中的錯誤
Server:Redhat 5.4
OEM Server:10.2.0.3升級10.2.0.5
Agent: 10.2.0.3升級10.2.0.5
說明:
Grid Control的組件包括Management Agent, Management Service (OMS), Management Repository. 系統架構如下:
Grid Control的原理和工作方式:
agent端的數據收集全部通過perl腳本來完成. 擴展名爲*.pl,這些腳本可以在 $AGENT_HOME/sysman/admin/scripts/ 下找到. agent程序首先會把采集到的信息寫到本地的xml文件當中, 生成的文件可以在 $AGENT_HOME/sysman/emd/upload 下找到. 然後再將該文件upload到oms端去, oms service再將xml文件寫入到oms自己的repository庫裏.
Agent端程序的工作方式:
當Agent部署到一個節點上時, 首先搜索 $ORACLE_BASE/oraInventory下安裝的所有oracle産品. 以便確定需要收集那些産品的信息, 比如只發現了一個數據庫産品, 那?就會只運行收集數據庫和主機信息的腳本. 對于一個節點來說, agent確定需要收集那些內容的信息寫在如下文件 $AGENT_HOME/sysman/emd/targets.xml 中, 該文件可以手工修改. 另外一個比較重要的文件是$AGENT_HOME/sysman/config/emd.properties, 是每一個agent的配置文件, agent所有的屬性都在裏面, 比如oms的url/TZ等, 該文件也可以手工修改, 修改完之後, 通過執行./emctl reload agent來使之生效.
在各目標主機的訪問上采用的是ssh方式訪問, 所以在Grid Control體系中, 主機啓用ssh是必須的.
提示: #後跟命令表示以root用戶操作, $後跟命令表示以oracle用戶操作.
10.2.0.3軟體安裝:
PS.因目前因出到12版本,目前的環境還是用10.2.0.5,但現在在官網已抓不到了…,但我手上有,所以還是介紹10.2.0.5
前置工作:
EM Server:加入本機的名稱
#vi /etc/hosts
127.0.0.1 localhost.localdomain localhost
10.55.78.198 c5oem2
修改核心參數
#vi /etc/sysctl.conf
kernel.shmall = 2097152
kernel.shmmax = 2147483648
kernel.shmmni = 4096
kernel.sem = 250 32000 100 128
fs.file-max = 101365
net.ipv4.ip_local_port_range = 1024 65500
net.core.rmem_default = 1048576
net.core.rmem_max = 1048576
net.core.wmem_default = 262144
net.core.wmem_max = 262144
讓參數生效
#/sbin/sysctl -p
建立用戶
# /usr/sbin/groupadd oinstall (如果oinstall組不存在則新建)
# /usr/sbin/groupadd dba (如果dba組不存在則新建, 該組擁有SYSDBA權限)
# useradd -g oinstall -G dba oracle -d /home/oracle (如果用戶不存在則新建)
# passwd oracle (設置密碼)
建立link,否則在安裝的過程中,會出現錯誤:
在"Web Cache Configuration Assistant"有OUI-25031的錯誤時
# ln -s /usr/lib/libgdbm.so.2.0.0 /usr/lib/libdb.so.2
建立Oracle目錄
[root@C5OEM2 ~]# mkdir -p /orasys/oracle
[root@C5OEM2 ~]# chown -R oracle:oinstall /orasys/oracle/
[root@C5OEM2 ~]# chmod -R 775 /orasys/oracle/
配置用戶環境
注意,若有中文亂碼的問題,要把NLS_LANG設置成中文環境, 否則以後登陸Grid控制台中文會有部分亂碼
PS.我這一段是註解掉,中文正常顯示,有異常的話,再把它拿掉
# su - oracle
$ vi ~/.bash_profile
# User specific environment and startup programs
export ORACLE_BASE=/orasys/oracle
export ORACLE_HOME=$ORACLE_BASE/db10g
export OMS_HOME=$ORACLE_BASE/oms10g
export AGENT_HOME=$ORACLE_BASE/agent10g
export ORACLE_SID=emrep
export ORACLE_HOSTNAME=C5OEM2
export ORACLE_OWNER=oracle
#export NLS_LANG="TRADITIONAL CHINESE_TAIWAN.ZHT16BIG5"
export LD_LIBRARY_PATH=$ORACLE_HOME/lib:/usr/X11R6/lib:$LD_LIBRARY_PATH
export PATH=.:/usr/sbin:$ORACLE_HOME/bin:$ORACLE_HOME/jdk/bin:$OMS_HOME/bin/:$PATH
export CLASSPATH=$ORACLE_HOME/jlib:$ORACLE_HOME/rdbms/jlib:$CLASSPATH
export LC=en_US
安裝10.2.0.3
Zip檔使用unzip來解壓縮
此時可以到 $ORACLE_BASE/oraInventory/logs 下查看最新安裝日志文件installActionsxxx.log, 了解安裝進度. 安裝步驟如下:
先確認系統變數有載入到系統中
#env | grep ORA
若沒有,先行載入
#soruce ~/.bash_profile
安裝OEM Server 10.2.0.3:
#./runInstall
選擇全新安裝一個新的db

路徑需要做更改,還有記的把中文也加進去


安裝前的確認,套件有一些沒有裝,使用yum install
# yum install openmotif21 pdksh gnome-libs sysstat xscreensaver
但有一些套件還是找不到,暫時忽略(openmotif21 gnome-libs xscreensaver),不影響,若之後有用到,再上網去找相關套件

跳出警告視窗,說有一些檢查是failed,再確認是否繼續,選擇Yes


設定SMTP,Mail等通知,可以等上線再來修改

設置密碼要求: 5-30個字符長, 不能同于用戶名, 必需包含大小寫字母和數字, 必須以字母開頭, 不能含有oracle保留字, oracle這裏本身的密碼提示不完全正確.


OPMN錯誤,請忽略
Error:The OPMN Process Manager failed to start.

請用root執行以下的Script,詢問的部份,全部用default,按enter就對了


OMS Configuration OUI-25031 Error:需要上Hotfix更新

下載hotfix(Oracle尚未拿掉,請記的下載到對的版本10.2.03)
https://updates.oracle.com/download/8430622.html
[oracle@C5OEM2 8430622]$ /orasys/oracle/oms10g/bin/emctl stop oms
Oracle Enterprise Manager 10g Release 3 Grid Control
Copyright (c) 1996, 2007 Oracle Corporation. All rights reserved.
Oracle Management Server is Down.
[oracle@C5OEM2 8430622]$ /orasys/oracle/oms10g/opmn/bin/opmnctl stopall
opmnctl: stopping opmn and all managed processes...
[oracle@C5OEM2 8430622]$ export ORACLE_HOME=/orasys/oracle/oms10g/
[oracle@C5OEM2 8430622]$ /orasys/oracle/oms10g/OPatch/opatch apply

[oracle@C5OEM2 8430622]$ emctl secure oms -reset

[oracle@C5OEM2 8430622]$ emctl start oms


此時可以到 $OMS_HOME/sysman/log 或 $AGENT_HOME/sysman/log 下了解各個組件安裝細節及其錯誤信息. 安裝完後各項服務已經自動啓動.
OEM升級10.2.0.5
先停止所有進程
#$OMS_HOME/bin/emctl stop oms
#$OMS_HOME/opmn/bin/opmnctl stopall
#$AGENT_HOME/bin/emctl stop agent
--檢驗資料庫
$ cd $OMS_HOME/sysman/admin/emdrep/sql/core/latest/admin/
$ sqlplus / as sysdba
SQL> select object_name, object_type from all_objects where owner='SYSMAN' and status <> 'VALID';
no rows selected
SQL> @admin_recompile_invalid.sql SYSMAN (如果有無效對象則執行)

SQL> show parameter job_queue_processes;(Default 10)
SQL> ALTER SYSTEM SET job_queue_processes=0; (如果該參數不爲0則修改爲0,程式執行完,記的改回來原來的值)
SQL>connect sysman/xxxx
SQL>exec emd_maintenance.remove_em_dbms_jobs;
SQL> exit;
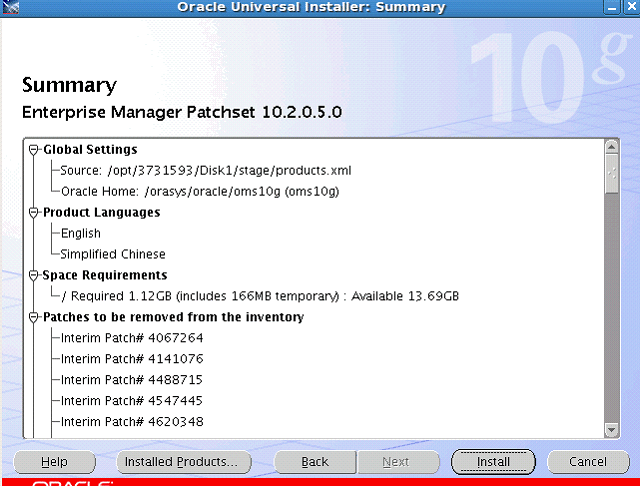
# unzip p3731593_10205_Linux-x86-64.zip
# chown -R oracle:oinstall 3731593/
# cd 3731593/Disk1
#export ORACLE_HOME=/orasys/oracle/oms10g
#./runInstaller
選擇oms10g

下一步會跳出警告視窗,選擇YES


Only OK to choose.


SQL> ALTER SYSTEM SET job_queue_processes=10;
此時可以到 $ORACLE_BASE/oraInventory/logs 下查看最新安裝日志文件 installActionsxxx.log 了解安裝進度. 到 $OMS_HOME/sysman/log 下了解安裝細節及其錯誤信息. 升級完後OMS各服務已經自動啓動.
OEM升級Agent(原來的檔案,10.2.0.5這一包裡頭)
$ export ORACLE_HOME=$ORACLE_BASE/OracleHomes/agent10g
$ ./runInstaller


可以到 $ORACLE_BASE/oraInventory/logs 下查看最新安裝日志文件 installActionsxxx.log 了解安裝進度. 到 $AGENT_HOME/sysman/log 下了解安裝細節及其錯誤信息. 升級完後Agent服務已經自動啓動.
登入方式:
比如本例登陸URL就是: http://c5oem1:4889/em
用戶名密碼sysman/xxxx, 進入GC後, web界面的顯示會根據浏覽器的首選語言展示.
如果在Windows裏登陸, 記得在 C:\WINDOWS\system32\drivers\etc\hosts 文件裏增加服務器ip和主機名的對應關系.
Client Agnet安裝:
安裝方法一(本地安裝)
該方法適用于被監控目標和OMS主機非同一操作系統平台, 下面還是以Linux平台爲例.
#cat /etc/hosts(主機需要與oms有對應關系),這邊以另一台主機c5oem1為範例
127.0.0.1 localhost.localdomain localhost
xxx.xxx.xxx.170 c5oem1
#echo $PATH (確保$ORACLE_HOME/jdk/bin放入PATH中, 因爲要用到jar命令)
#source ~/bash_profile
# export ORACLE_HOME=$ORACLE_BASE/OracleHomes/agent10g
#mkdir $ORACLE_BASE/OracleHomes/agent10g
# ./runInstaller

記得把中文也加進去

# yum install openmotif21 pdksh gnome-libs sysstat xscreensaver
但有一些套件還是找不到,暫時忽略(openmotif21 gnome-libs xscreensaver),不影響,若之後有用到,再上網去找相關套件


全部用Default


此時可以到 $AGENT_HOME/sysman/log 下了解安裝細節及其錯誤信息, 安裝完後agent服務應自動啓動, 如果沒有起來就手工啓動即可, 然後在GC控制台的"目標"標簽裏就可以看到被監控的主機了.如果/etc/oratab裏有實例信息, 也可以看到被監控的數據庫信息, 只是要先配置一下dbsnmp用戶密碼即可
查看Agent狀態信息:
#$AGENT_HOME/bin/emctl status agent
如果未啓動可以手工設置並啓動:
# $AGENT_HOME/bin/emctl secure agent (執行安全認證)
Enter Agent Registration password : <輸入OMS安全密碼xxxx>
# $AGENT_HOME/bin/emctl start agent (啓動agent)
# $AGENT_HOME/bin/emctl status agent (檢查agent狀態)
# $AGENT_HOME/bin/emctl upload (嘗試手工上傳xml)
登入OEM:

OEM主機需要把要納管的主機加入到hosts,按"configure"


手動配置OEM:
配置監控數據庫
1) 首先對目標庫DBSNMP用戶解鎖, 如果需要可以修改密碼;
SQL> select password,account_status from dba_users where username = 'DBSNMP';
SQL> alter user DBSNMP identified by "oracle" account unlock;
2)確保目標庫 $ORACLE_HOME/dbs目錄下 hc_$ORACLE_SID.dat 文件存在且只有一個, 注意區分大小寫.
3) 然後進入GC控制台, 選擇"Targets目標", 選擇"Database數據庫", 單擊"add添加", 選擇某個主機, 如果自動尋找不到數據庫, 則點擊"手工添加", 輸入實例名/Oracle Home/dbsnmp用戶口令/端口1521/sid等信息後點擊"測試連接", 如果提示"連接測試成功"則點擊"下一步"並點擊兩次"確定", 這樣就加入了新的被監控數據庫. 現在應該就可以看到目標庫的完整顯示信息了.
4) 如果在控制台頁面一直無法手工加數據庫目標, 或者默認自動增加的數據庫信息需要修改, 則手工編輯targets.xml文件, 增加或修改監聽oracle_listener和數據庫實例oracle_database兩種類型(NAME參數內容需根據實際情況更改).
$ vi $AGENT_HOME/sysman/emd/targets.xml
<Targets AGENT_TOKEN="6f9252e24822717731b5b2c040639990ad9e49e6">
<Target TYPE="oracle_emd" NAME="C5TSPCDB1:3872"/>
<Target TYPE="host" NAME="C5TSPCDB1"/>
<Target TYPE="oracle_listener" NAME="LISTENER_C5TSPCDB1">
<Property NAME="ListenerOraDir" VALUE="/orasys/10.2/network/admin"/>
<Property NAME="LsnrName" VALUE="LISTENER"/>
<Property NAME="Machine" VALUE="C5TSPCDB1"/>
<Property NAME="OracleHome" VALUE="/orasys/10.2"/>
<Property NAME="Port" VALUE="1521"/>
</Target>
<Target TYPE="oracle_database" NAME="c5tspc1">
<Property NAME="OracleHome" VALUE="/orasys/10.2"/>
<Property NAME="UserName" VALUE="dbsnmp"/>
<Property NAME="MachineName" VALUE="C5TSPCDB1"/>
<Property NAME="Port" VALUE="1521"/>
<Property NAME="SID" VALUE="c5tspc1"/>
<Property NAME="ServiceName" VALUE="c5tspc1"/>
<Property NAME="password" VALUE="b094f5e71fe8e2d2" ENCRYPTED="TRUE"/>
<Property NAME="Role" VALUE="NORMAL"/>
</Target>
</Targets>
5) 最後重載配置文件:
# $AGENT_HOME/bin/emctl reload agent
此時到Grid Control控制台則可以看到剛剛配置的數據庫目標信息,只是dbsnmp密碼會根據實際要求重新配置一遍. 如果是修改信息, 那?還可能需要在控制台頁面裏把舊的配置刪除.
PS.若沒有更新資訊,請先等個n分鐘,或者測試以下方式
emctl stop agent
emctl clearstate agent
emctl start agent
emctl reload agent
emctl upload agent
安裝方法二(透過OEM遠端安裝):
前置動作:
OEM Server,加入ip, name:
cat /etc/hosts
加入需要監控主機的ip & name
修改sudo路徑,原來的設定找不到sudo路徑:
#vi $OMS_HOME/sysman/agent_download/10.2.0.3.0/linux_x64/agentdeploy/ssPaths_linuxx64.properties
尋找sudo,
舊的設定:SUDO_PATH=/usr/local/bin/sudo
改成新的設定:SUDO_PATH=/usr/bin/sudo
OEM WEB安裝:
Deployments→Install Agent→Fresh Install
因這邊是從10.2.0.3.0升級到10.2.0.5.0,所以Agent一樣要從10.2.0.3.0安裝
設定頁面:


安裝過程會有錯誤,一樣是OS版本不一樣、需要安裝套件,忽略此警告,下一步。


升級Agent到10.2.0.5
請參考上面的升級。
安裝完之後的Target,上面顯示的是ip

Remove此IP,並shutdown agent
先stop Agent
#/orasys/product/agent10g/bin/emctl stop agent,再Remove此ip
1. Go to the target machine when you can change the target name
2. Go to agent $AGENT_HOME/sysman/emd directory
3. Find the targets.xml file
4. make a backup of copy of the targets.xml to something like targets.xml.bak
5.Edit the file and search for the target name you want to change and then change the name to the new name you want the target to have.
內容請參考"手動配置OEM"裡的targets.xml File
6. Go to agent ORACLE_HOME/bin directory and run the following
emctl stop agent
emctl clearstate agent
emctl start agent
emctl reload agent
emctl upload agent
After a few minutes go into the OEM Grid Control GUI and you should see the new target name

Agent移除:
[oracle@C5TDB2 /]$ /orasys/product/OracleHomes/agent10g/oui/bin/runInstaller -silent -deinstall -removeallfiles -removeAllPatches REMOVE_HOMES="{/orasys/product/OracleHomes/agent10g}"
Starting Oracle Universal Installer...
No pre-requisite checks found in oraparam.ini, no system pre-requisite checks will be executed.
Preparing to launch Oracle Universal Installer from /tmp/OraInstall2014-03-13_05-20-01PM. Please wait ...[oracle@C5TDB2 /]$ Oracle Universal Installer, Version 10.2.0.5.0 Production
Copyright (C) 1999, 2009, Oracle. All rights reserved.
Starting deinstall
Deinstall in progress (Thursday, March 13, 2014 5:20:05 PM CST)
WARNING:The directory: /orasys/product/OracleHomes/agent10g will be deleted after deinstall.
Click on "Yes" to continue.
Click on "No" to perform deinstall without deleting the directory.
Click on "Cancel" to go back to "Inventory Dialog".
Configuration assistant "Agent Deinstall Assistant" succeeded
.......................................................................................................... 100% Done.
Deinstall successful
End of install phases.(Thursday, March 13, 2014 5:20:27 PM CST)
End of deinstallations
Please check '/u1/oracle/oraInventory/logs/silentInstall2014-03-13_05-20-01PM.log' for more details.
OEM/OMS/Agent日常維護指令
日常維護
Start/Stop GC全部進程
--Stop everything, including AS/OMS/WebCache
$ $OMS_HOME/opmn/bin/opmnctl stopall
$ ps -ef | grep "opmn -d" | grep -v grep
--Start everything, including AS/OMS/WebCache
$ $OMS_HOME/opmn/bin/opmnctl startall
--View status
$ $OMS_HOME/opmn/bin/opmnctl status
--view log
$ cd $OMS_HOME/opmn/logs/
$ ll
OMS進程管理
--Stop the Management Service
$ $OMS_HOME/bin/emctl stop oms
--Start the Management Service
$ $OMS_HOME/bin/emctl start oms
--View status
$ $OMS_HOME/bin/emctl status oms
--view log
$ cd $OMS_HOME/sysman/log/
$ tail -500f emoms.trc
Agent進程管理
--Stop the Management Agent
$ $AGENT_HOME/bin/emctl stop agent
--Start the Management Agent
$ $AGENT_HOME/bin/emctl start agent
--View status
$ $AGENT_HOME/bin/emctl status agent
安裝過程中的錯誤:
Error 1:OPatch failed with error code 73
A: 版本錯誤,因下載到的hotfix(8430622),是10.2.0.1的版本,Server安裝的是10.2.0.3,所以要重新下載hotfix

Error 2: ORA-12545: Connect failed because target host or object does not exist
[oracle@C5OEM2 8430622]$ sqlplus / as sysdba
SQL*Plus: Release 10.1.0.4.0 - Production on Wed Mar 12 13:17:23 2014
Copyright (c) 1982, 2005, Oracle. All rights reserved.
ERROR:
ORA-12545: Connect failed because target host or object does not exist
A:$ORACLE_HOME設定錯誤
使用export重新設定
Error 3: ORA-01102: cannot mount database in EXCLUSIVE mode
此錯誤是發生使用Agent安裝方法一時出現的錯誤,Agent有正常安裝,但透過ssh無法啟動db
SQL> startup
ORACLE instance started.
Total System Global Area 536870912 bytes
Fixed Size 1322944 bytes
Variable Size 270258240 bytes
Database Buffers 264241152 bytes
Redo Buffers 1048576 bytes
ORA-01102: cannot mount database in EXCLUSIVE mode
A:透過SSH遠端啟動db,直接在安裝畫面進入sqlplus或重新啟動oracle db
Error 4:emd_maintenance.remove_em_dbms_jobs Error

A:因 job未完全停止
SQL>connect / as sysdba
SQL>alter system set job_queue_processes = 0;
SQL>connect sysman/xxxx
SQL>exec emd_maintenance.remove_em_dbms_jobs;
SQL>shutdown abort;
SQL>startup;
Error5:從oem佈屬agent出現的錯誤
Following binary paths are incorrect or not defined in the following hosts.
Binary Path: /usr/local/bin/sudo(SUDO_PATH) on host 10.55.79.10
Check the property values in the following files in this order, ssPaths_<plat>.properties or sPaths.properties or userPaths.properties in <OMS_HOME>/sysman/agent_download/10.2.0.3.0/linux_x64/agentdeploy directory.
If all of the above files are not found, then look for these property files in <OMS_HOME>/sysman/prov/resources directory.
For more details look at the 10g R2 Management Agent Deployment Best Practices
A: 因sudo的路徑不對,開啟檔案來做修改agent
vi $OMS_HOME/sysman/agent_download/10.2.0.3.0/linux_x64/agentdeploy/ssPaths_linuxx64.properties
尋找sudo,
舊的設定:SUDO_PATH=/usr/local/bin/sudo
改成新的設定:SUDO_PATH=/usr/bin/sudo
Error 6:EMD upload error
[oracle@c5spcdb1 emd]$ emctl upload agent
TZ set to ROC
Oracle Enterprise Manager 10g Database Control Release 10.2.0.4.0
Copyright (c) 1996, 2007 Oracle Corporation. All rights reserved.
EMD upload error: uploadXMLFiles skipped :: OMS version not checked yet..
A:
1.代表agent還存在著舊資料,清除舊資料再重新啟動
emctl stop agent
emctl clearstate agent
emctl start agent
emctl reload agent
emctl upload agent
http://cch8.blogspot.tw/2010/11/emd-upload-error-uploadxmlfiles-skipped.html
2.或者是,用錯agent了,可能使用到Oracle em本身的emctl指令,要使用Grid Control的emctl(路徑不一樣)
相關資料Reference:
OEM Install
http://tc.wangchao.net.cn/it/detail_59431.html
OMS Configuration OUI-25031 Error:
http://www.yenlo.nl/nl/severe-oui-25031-installing-oem-10-2-0-3-0/
Hotfix:8430622
https://updates.oracle.com/download/8430622.html
Rename Target in OEM Grid Control
http://oramrmessin.blogspot.tw/2008/03/rename-target-in-oem-grid-control.html
OEM/Agent 12c Install
http://wenku.baidu.com/view/285c54d349649b6648d747d8&clickSort=download

